Getting Started
Terminal Translator is a translation CLI that uses the Google Cloud API.
Installation
Installation is very simple, just run the following command in the terminal:
pip install tt-terminal-translator
We recommend trying pipx
pipx is a tool to help you install and run end-user applications written in Python.
pipx install tt-terminal-translator
Configuration
To start using the CLI, first we need to configure the access credentials for the Google API.
Login to the Google Cloud API, and click start free.

A credit card will be required but don't worry, there will be no charge.
Go to the google cloud console home page and create a new project
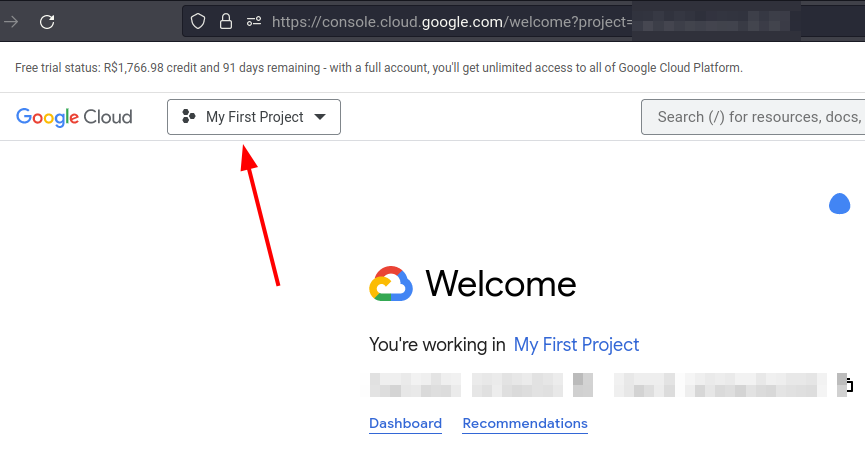

Give the project any name

Select the project, and save the project-id

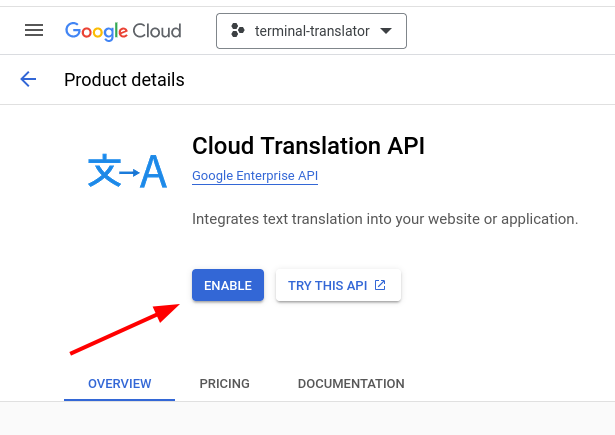
Search for Cloud Translation API and enable it
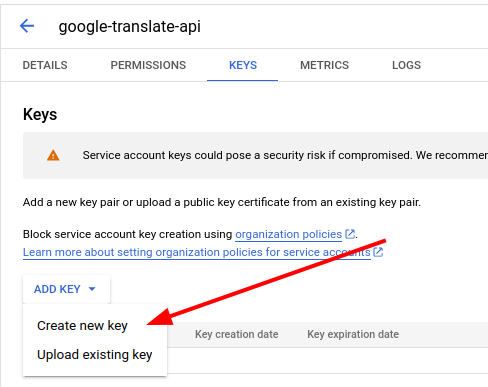
Create an access credential
Be aware of the usage quota limit
Don't share your credentials


Give the service account any name

Go back to the API page and select your service account, and create a new Json type key
A json file containing your credentials will be downloaded

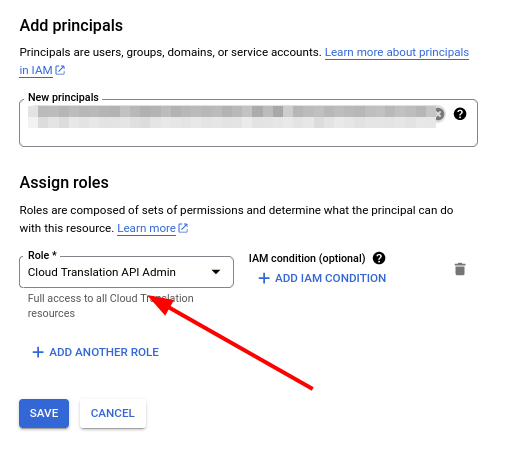
Go back to your service accounts and copy the respective email

In the IAM session, grant access to this email and assing the role Cloud Translation API Admin

Now with the configured service credentials we can go to the CLI
Use the tt-configure command passing two arguments, first the project-id followed by the path of the credentials Json file.
tt-configure <project-id> <google-api-credentials>

Finished! Now you are ready to use the Terminal Translator CLI
See the tutorial session to learn about the basic usage